Previous Chapter Tutorial Home Next Chapter
Note: This tutorial assumes that you already know how to write Fortran programs, that you are working on a UNIX system so you can view NCAR Graphics man pages and access the tutorial examples via the ncargex command, and that you are acquainted with some NCAR Graphics terminology.
We highly recommend that you study chapters 1 through 4 of the NCAR Graphics Fundamentals guide before attempting to use this manual.
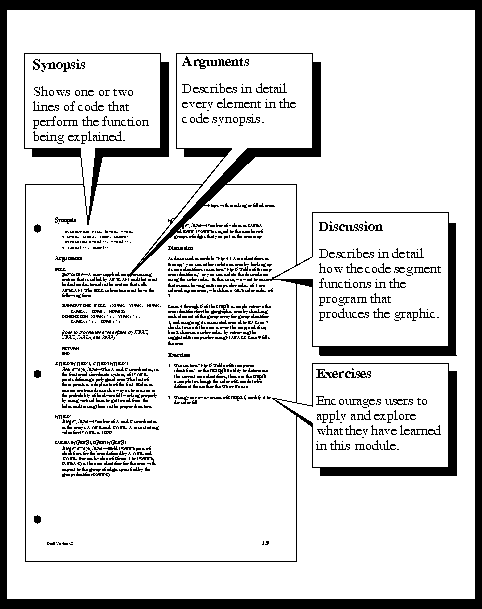
Each module describes a single concept or task. Most modules appear on two facing pages, so the two-page spreads you see in this manual provide all the essential information you need to understand a single concept or accomplish a single task.
The structure of the modules is consistent; this helps you focus on the material being presented. The sequence of modules leads you from learning basic information about NCAR Graphics programs to performing increasingly more complex tasks.
On a larger scale, the chapters are organized by utility: Areas, then Ezmap, then Conpack. Each chapter leads you from basic information about one utility to more complex tasks you can perform with that utility. To help you understand how the utilities work together, the Ezmap chapter incorporates some material from the Areas chapter, then the Conpack chapter integrates material from both Ezmap and Areas.
NCAR Graphics Fundamentals contains important information for all users: a glossary of NCAR Graphics terms, the structure of NCAR Graphics programs, strategies for learning NCAR Graphics, instructions for compiling, linking, and running programs, instructions for producing and editing output from NCAR Graphics programs, and guidelines for using the utilities.
The online man pages provide concise reference information for all user entry points, user-modifiable internal routines, parameters used in all utilities, and NCAR Graphics commands (such as ncargex). The overview man page ncargintro introduces all utilities in the package, and overview man pages for each utility introduce all routines in that utility.
Programmer documents are the software developers' reference notes; they are provided for users who want to explore the information that developers use to maintain a utility's source code.
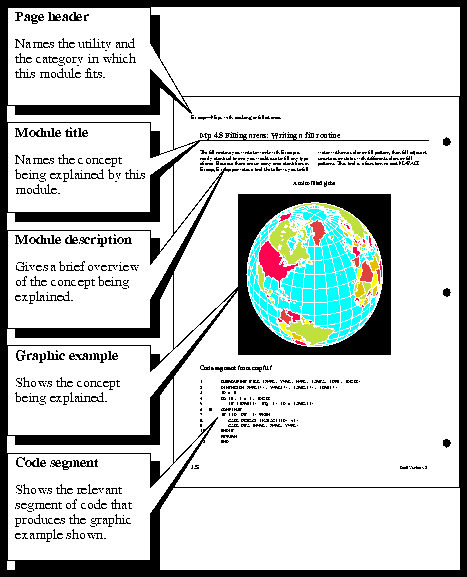
The ncargex command allows you to access more than 250 examples, and all of them are internally documented with comments. A brief introduction to ncargex is provided under the "Code segment" heading below, and procedures for using ncargex appear in Chapter 2 "Five quick steps for creating and viewing your plot" of NCAR Graphics Fundamentals. A pictorial index to all NCAR Graphics examples is provided as Appendix D of Fundamentals.

A functional outline for the utility is presented at the end of each chapter's first section and on the first page of each subsequent section. This outline shows the basic steps needed to run the utility. The steps to be discussed in that section are marked with asterisks to help you see how the concepts described in that section fit into any Fortran program using the utility.
The second section of a chapter may provide additional preliminary information. All subsequent sections then contain task-oriented modules that lead you through all steps necessary to use the utility.
Module numbering indicates the chapter (with the two-letter utility code), the section (first number), and the module (second number, after the period). For example, module Cp 9.4 is the fourth module in the ninth section of the Conpack chapter. In some cases, multiple modules are needed to cover a group of related concepts; all such modules are grouped together with an additional number (for example, Cp 6.9.1 through Cp 6.9.4).
All black-and-white graphics appear on your screen as white lines on a black background; in this manual, these examples are printed with black lines on a white background. This reversal is done so the graphics are easier to see in the manual. Most color graphics in this manual appear exactly as they do on your screen; in rare cases, a black background is changed to white for improved readability on the printed page.
The first instance of a color graphic is always printed in color. If a color graphic occurs twice in a four-page module, however, the second instance of the graphic appears in black and white.
The heading "Code segment from example_name.f" gives you the name of the example file. To run the example and create the NCAR CGM (NCGM), type:
All Fortran code is printed in this manual with the Courier (typewriter) font. This monospaced type font preserves the correct relationships of Fortran columns. Any Fortran code that continues onto the next line is printed with a plus sign (+) in column 6 of the continued line.
Two important pieces of information follow the argument name: its Fortran type and its function in the program. When parameters are listed under the Arguments heading, only their Fortran type is given.
Fortran types include INTEGER, REAL, and CHARACTER, plus arrays of these types (the dimension of any array is always indicated). The argument's function in the program may be as input (the user supplies a value for the argument), output (the routine returns information to the user or the program in the argument), workspace (a scratch array for the routines to use in manipulating information, but that the user must declare), or as a subroutine (a special-purpose routine that the user typically writes or modifies to produce a desired result).
In parameter descriptions, uppercase letters show how the characters that comprise the parameter name are derived. Uppercase letters are also used in this way in the tables of parameters at the beginning and end of each chapter. This is not done for argument names, although the argument names are often derived in a similar way.
Wherever it is appropriate, specific values and ranges of values are explained in text that is indented from the text describing arguments and parameters.
Characters used as variables to represent a number (n or m for example) are printed in italics.
All references to example names, filenames, and commands are printed with bold characters.
Previous Chapter Tutorial Home Next Chapter